
Install RustFS on macOS
Install a local RustFS instance on macOS with RustFS Launcher or the standalone server binary.
This guide provides two ways to run RustFS on macOS: use the graphical RustFS Launcher, or run the standalone server binary from Terminal. Both methods create a local, single-node instance suitable for evaluation, development, and testing.
Deployment scope
These procedures run RustFS as a desktop process, not as a macOS background service. For a production or distributed deployment, use the Linux installation guides.
Check your Mac architecture
RustFS distinguishes between Apple Silicon (arm64) and Intel (x86_64) Macs. Open Terminal and run:
uname -mUse the result to choose the correct package:
| Result | Mac type | Current standalone binary availability |
|---|---|---|
arm64 | Apple Silicon | Download the macOS AArch64 package from current RustFS releases. |
x86_64 | Intel | RustFS releases after v1.0.0-beta.9 do not provide a prebuilt Intel macOS package. Build the current version from source. |
Intel Mac release boundary
Do not run the Apple Silicon binary on an Intel Mac. If you need a RustFS version newer than v1.0.0-beta.9 on Intel macOS, follow the source-build procedure in this guide. An older beta.9 binary does not contain fixes and features from later releases.
Before continuing, also make sure that:
- You have permission to install or run applications and write to the selected data directory.
- TCP ports
9000and9001are available, or you have selected two other unused ports. - You have created a dedicated data directory, such as
$HOME/rustfs/data.
mkdir -p "$HOME/rustfs/data"Protect the data directory
Use an empty directory on a disk with enough free space. Do not store unrelated files in this directory, and do not edit RustFS data files while the server is running.
Choose an installation method
| Method | Use it when | Architecture note |
|---|---|---|
| RustFS Launcher | You want a graphical setup and built-in log viewer. | Download a Launcher package that matches Apple Silicon or Intel. |
| Standalone binary | You want explicit Terminal commands or scripting. | Current releases provide Apple Silicon binaries; Intel users build releases after beta.9 from source. |
Install with RustFS Launcher
Download and install Launcher
- Open the RustFS Launcher Releases page.
- Select the latest release and expand Assets.
- Download the macOS installer that matches your architecture: AArch64 for Apple Silicon or x86-64 for Intel. Do not download Source code unless you intend to build Launcher yourself.
- Open the downloaded disk image and move RustFS Launcher to Applications.
- Open RustFS Launcher from Applications.
If macOS blocks the first launch, confirm that the package came from the official rustfs/launcher Releases page. Then open System Settings > Privacy & Security and allow that specific application. Do not disable Gatekeeper globally.
Configure Launcher
Configure the fields in the Launcher window:
| Section | Field | Recommended value | Description |
|---|---|---|---|
| Dataset Mount | Data Path | $HOME/rustfs/data | Existing directory where RustFS stores object data. |
| Ports & Access | API Port | 9000 | S3-compatible API port. |
| Ports & Access | Host | 127.0.0.1 | Restricts access to this Mac. |
| Ports & Access | Console Endpoint | Enabled | Enables the web Console; Launcher disables it by default. |
| Ports & Access | Console Port | 9001 | Console port, which must differ from the API port. |
| Credentials | Access Key | <your-access-key> | Administrator access key for this instance. |
| Credentials | Secret Key | <your-secret-key> | Administrator secret key for this instance. |
Use Browse to select the data directory or drag it into Launcher. Launcher requires the directory to exist before startup. The macOS file picker displays the expanded path instead of the literal $HOME variable.
Replace the credential placeholders with your own values. Launcher initially displays default local-test credentials; do not retain them on a Mac accessible by other users.
Network exposure
Keep Host set to 127.0.0.1 unless another computer must connect to RustFS. A non-loopback address exposes the API and Console on the corresponding network interfaces. Configure the macOS firewall and strong credentials before allowing remote access.
Start and verify RustFS
- Select Launch RustFS.
- Wait for Launcher to report that the configured endpoint is online.
- Open
http://localhost:9001and sign in with the access key and secret key that you configured. - Use
http://localhost:9000as the endpoint for S3-compatible clients.
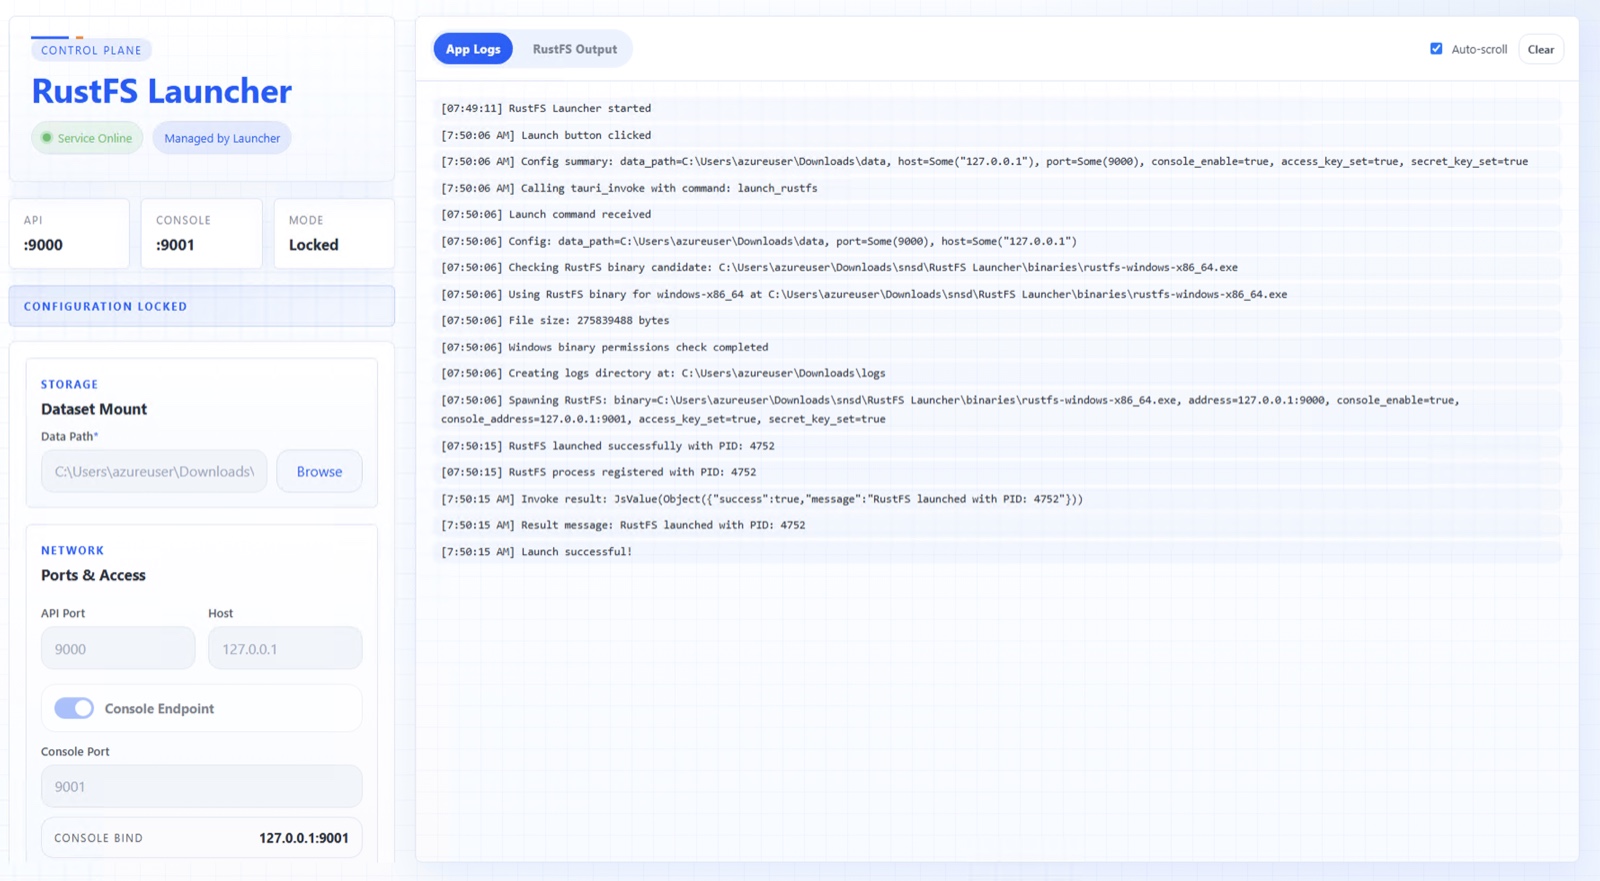
If you changed the host or ports, use those values instead. The Console URL is available only when Console Endpoint is enabled.
Launcher locks its configuration while it manages a running process. It also creates a logs directory next to the data directory. For example, selecting $HOME/rustfs/data places server log files under $HOME/rustfs/logs.
Stop or exit Launcher
Select Stop RustFS before changing configuration, disconnecting an external data disk, or shutting down macOS.
Closing the Launcher window hides it in the menu bar; it does not stop RustFS. To stop the managed process and exit Launcher, open the Launcher menu bar icon and select Quit. Select Show, or select the icon, to restore the window.
Install the standalone binary
Download the Apple Silicon binary
Use this procedure when uname -m returns arm64:
- Open the RustFS Releases page.
- Select the required release and download the macOS AArch64 ZIP archive from Assets. The asset name begins with
rustfs-macos-aarch64. - Create a program directory and extract the archive. Replace
<version>with the version in the downloaded filename:
mkdir -p "$HOME/rustfs/bin"
unzip "$HOME/Downloads/rustfs-macos-aarch64-<version>.zip" -d "$HOME/rustfs/bin"
chmod +x "$HOME/rustfs/bin/rustfs"
"$HOME/rustfs/bin/rustfs" --help
If the archive contains a platform-specific binary name instead of rustfs, use that filename in the remaining commands or rename it to $HOME/rustfs/bin/rustfs.
Build the Intel binary from source
Use this procedure when uname -m returns x86_64 and you need a release newer than v1.0.0-beta.9.
- Install the Xcode command-line tools:
xcode-select --install- Install the current stable Rust toolchain from rustup.rs, then open a new Terminal session.
- Clone RustFS and check out the release that you need:
git clone https://github.com/rustfs/rustfs.git
cd rustfs
git checkout <release-tag>- Build the Intel macOS target with the repository build script:
./build-rustfs.sh --platform x86_64-apple-darwinThe build script includes Console assets by default and verifies the resulting binary. Use the binary reported at the end of the build output in the next step.
Source-build dependencies
Building from source requires the tools used by the selected RustFS release in addition to Rust and the Xcode command-line tools. If the build reports a missing dependency, follow the requirements in that release's repository README rather than substituting a binary built for Apple Silicon.
Start the standalone server
Set credentials for the current Terminal session and assign the path to your downloaded or compiled binary:
export RUSTFS_ACCESS_KEY="<your-access-key>"
export RUSTFS_SECRET_KEY="<your-secret-key>"
export RUSTFS_BIN="$HOME/rustfs/bin/rustfs"

"$RUSTFS_BIN" server \
	--address "127.0.0.1:9000" \
	--console-enable true \
	--console-address "127.0.0.1:9001" \
	"$HOME/rustfs/data"
For an Intel source build, replace RUSTFS_BIN with the binary path printed by build-rustfs.sh. Keep the Terminal window open while RustFS is running. Press Control+C to stop the server.
Credential handling
Session environment variables avoid placing credentials directly in the command line. For repeated or automated use, prefer the RUSTFS_ACCESS_KEY_FILE and RUSTFS_SECRET_KEY_FILE environment variables and protect those files with macOS permissions.
Verify the standalone server
Open http://localhost:9001 and sign in with the configured credentials. Use http://localhost:9000 as the endpoint for S3-compatible clients. RustFS defaults to path-style addressing, so configure clients accordingly.
To perform an end-to-end check, create a bucket named my-bucket, upload hello.txt, and confirm that the object appears in the bucket.
Confirm a successful installation
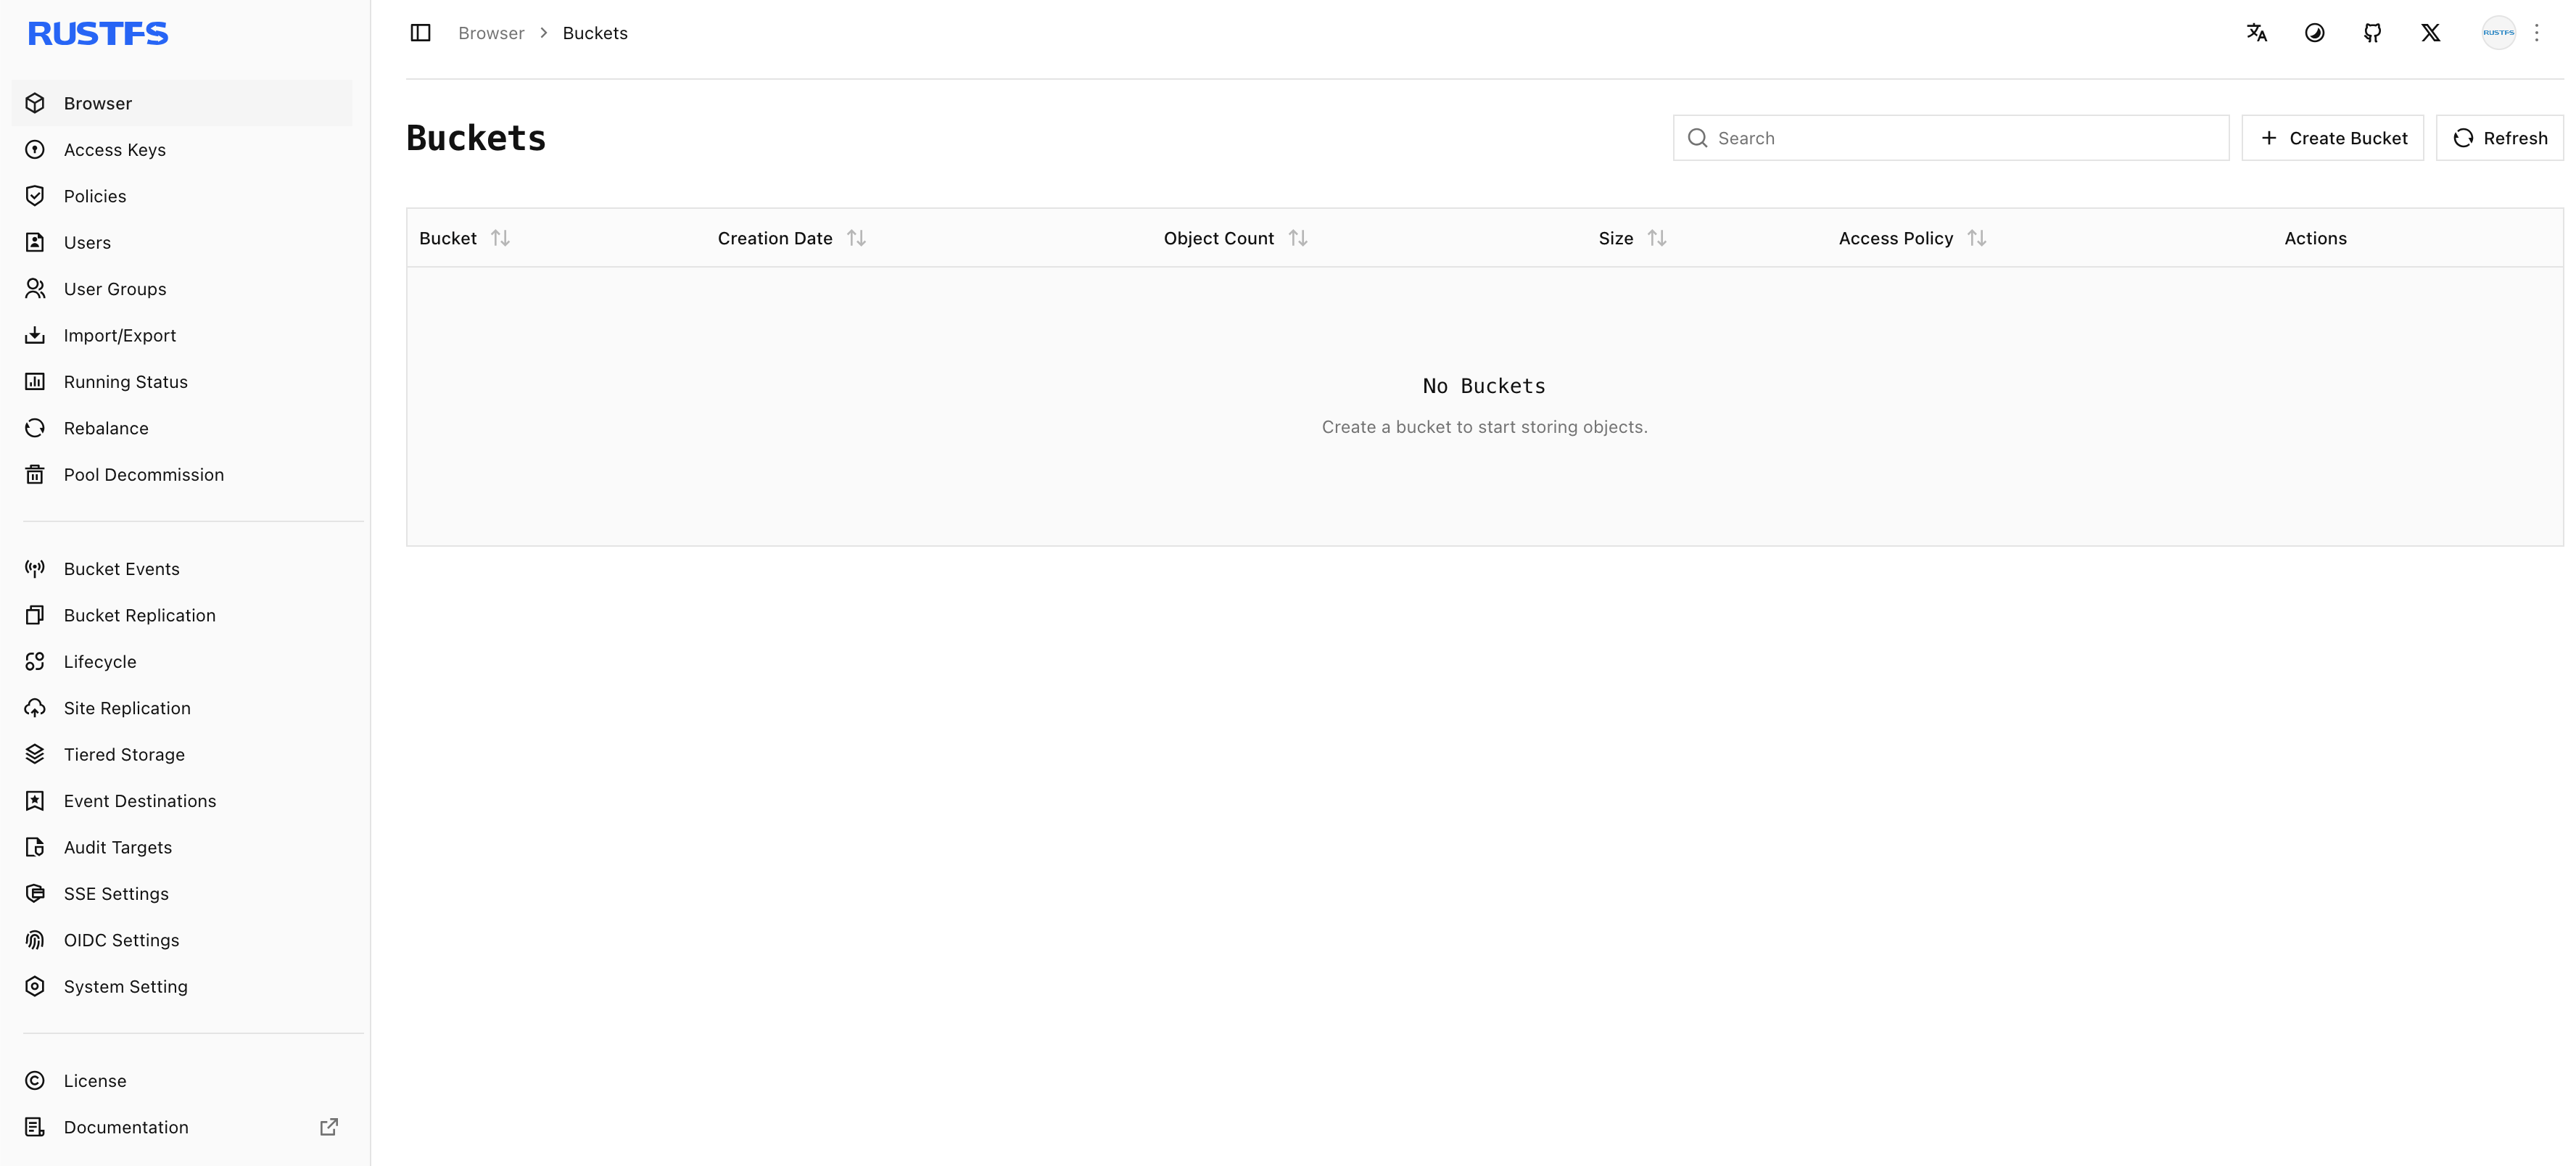
Whether you used Launcher, an Apple Silicon binary, or an Intel source build, a successful Console sign-in opens the Buckets page.
Troubleshooting
macOS blocks the application or binary
Verify that the file came from the official RustFS GitHub organization. For Launcher, allow the specific application under System Settings > Privacy & Security. For a standalone binary that macOS has quarantined, inspect the warning and verify the download source before changing its security attributes.
The binary architecture does not match
Run uname -m and inspect the binary:
uname -m
file "$RUSTFS_BIN"
Use an AArch64 binary on Apple Silicon. On an Intel Mac, build releases after v1.0.0-beta.9 from source for x86_64-apple-darwin.
The data path is rejected
Confirm that the directory exists and that your macOS account has read and write access. Launcher does not create the selected data directory for you.
The API or Console port is unavailable
The ports must be numbers from 1 to 65535, must differ from each other, and must not already be in use. Inspect the default ports:
lsof -nP -iTCP:9000 -iTCP:9001 -sTCP:LISTENStop the conflicting application or select unused ports, then start RustFS again.
The Console does not open
For Launcher, confirm that Console Endpoint is enabled. For the standalone binary, confirm that the process is still running and that --console-enable true is present.
Launcher reports an external RustFS process
Another process is listening on the configured API address, but Launcher did not start it. Stop that process or choose another API port. Launcher cannot stop a process it does not manage.
RustFS exits after launch
In Launcher, inspect both the application and RustFS tabs in the built-in log viewer. For a standalone installation, inspect the Terminal output. Common causes include a missing data directory, insufficient permissions, an architecture mismatch, or a port conflict.
Next steps
- Review the S3 API guide before connecting a client.
- Learn how to create a bucket.
- See status checks for additional verification methods.
- Use the Linux installation guides for a production-oriented deployment.