
Console: First Steps
Sign in to the RustFS Console for the first time, create a bucket, and upload your first object.
Once your RustFS server is running, the embedded web console is the fastest way to verify the installation and start working with your data. This short tutorial walks you through your first session.
Open the Console
The console listens on port 9001 by default. In your browser, open:
http://<server-ip>:9001For a local test install, that is http://127.0.0.1:9001.
Sign In
Sign in with the credentials configured at install time:
- If you used the Linux quick-start script, the access key and secret key were printed at the end of the installation output.
- If you started RustFS via Docker or a systemd unit, use the values of
RUSTFS_ACCESS_KEYandRUSTFS_SECRET_KEYfrom your configuration (see the Docker guide).
For production deployments, change any default credentials before exposing the console. See the Security Checklist.
A Quick Tour
After signing in you land on the console home page, which shows:
- Buckets — a list of your buckets, with a Create Bucket button in the top left.
- Usage overview — object count and storage consumption at a glance.
- Access Keys — management of programmatic credentials (see step 6).
Create Your First Bucket
- On the Buckets page, in the top right corner, select Create Bucket.
- Enter a bucket name (for example
my-first-bucket) and click Create.
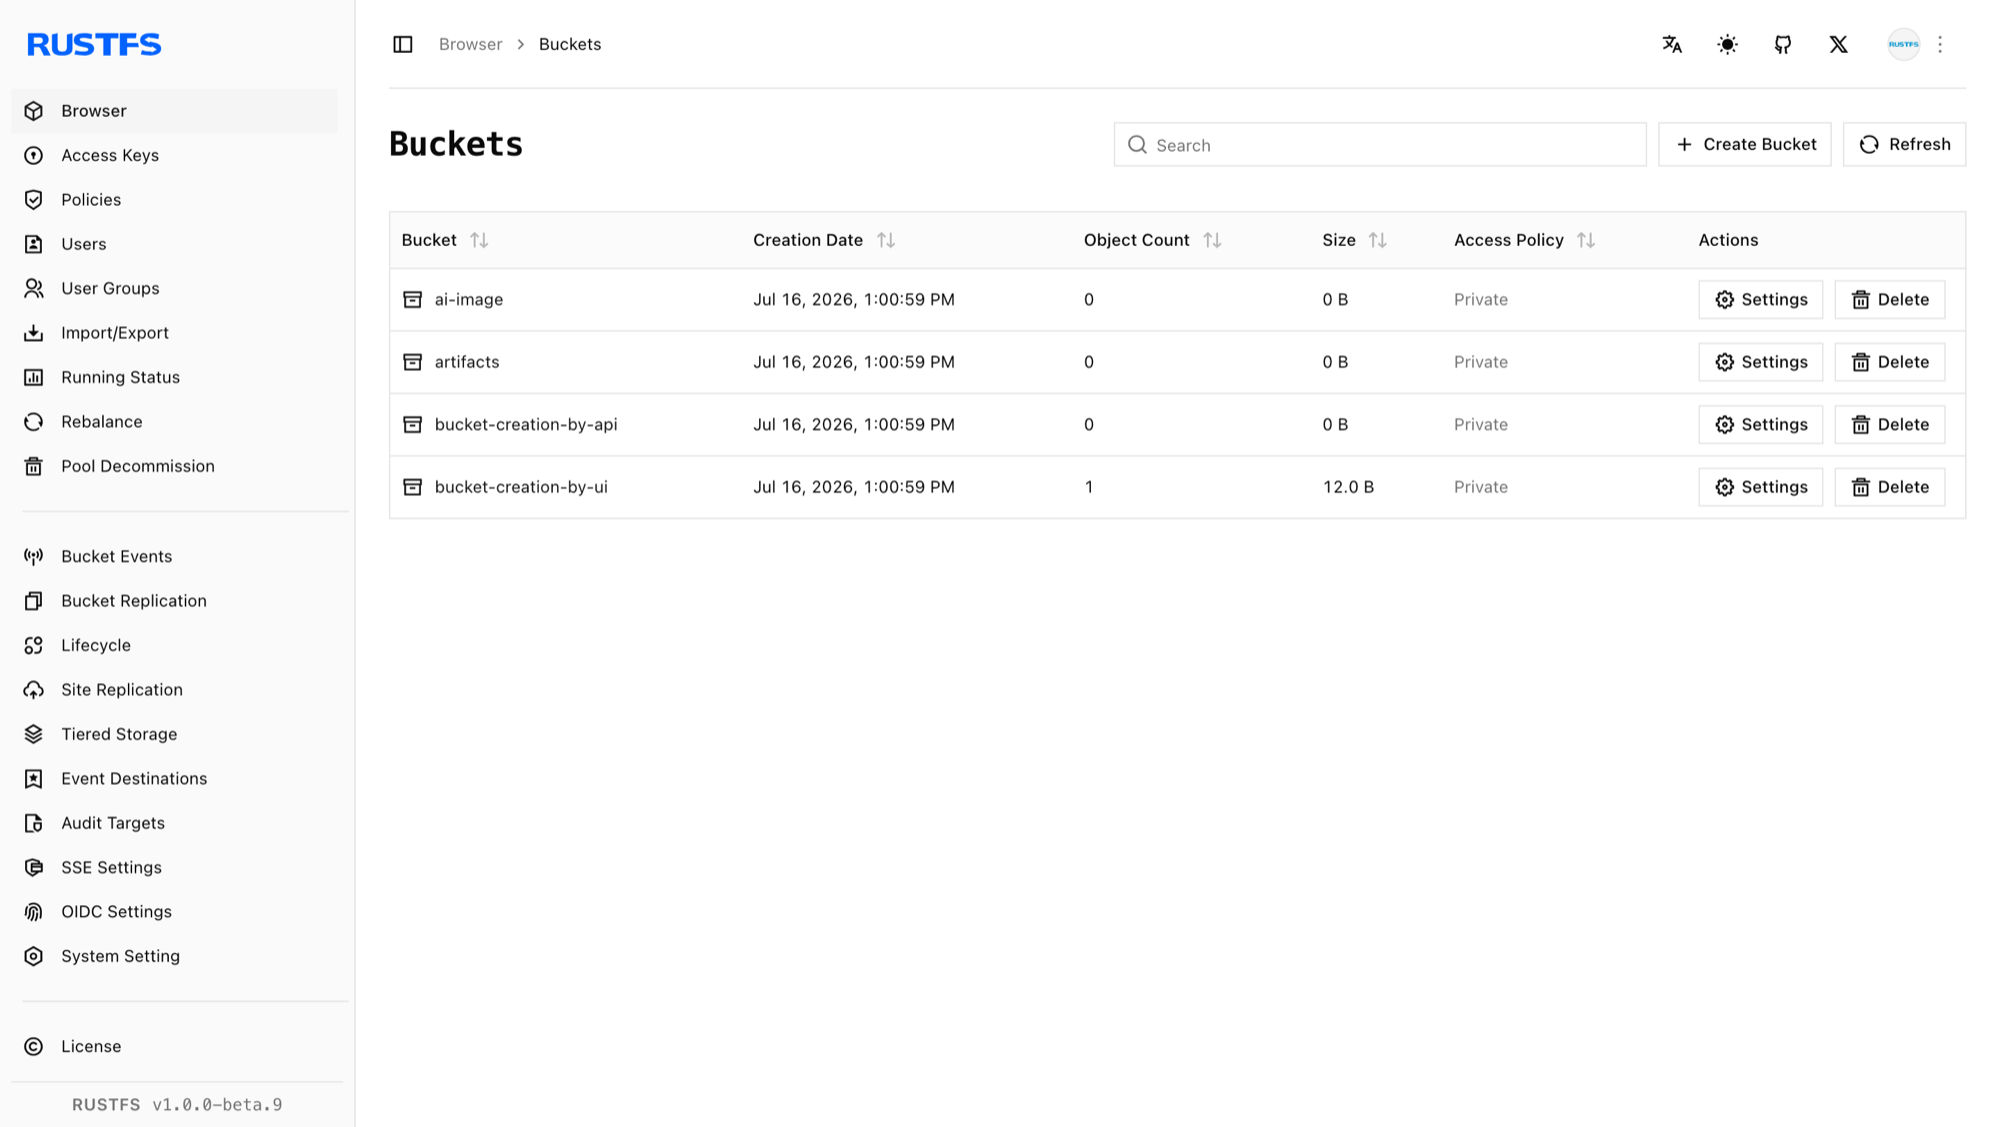
Full details, including mc and API alternatives, are in Bucket Creation.
Upload Your First Object
- Click the bucket you just created.
- In the top right corner, select Upload File/Folder.
- Choose one or more local files and click Start Upload.
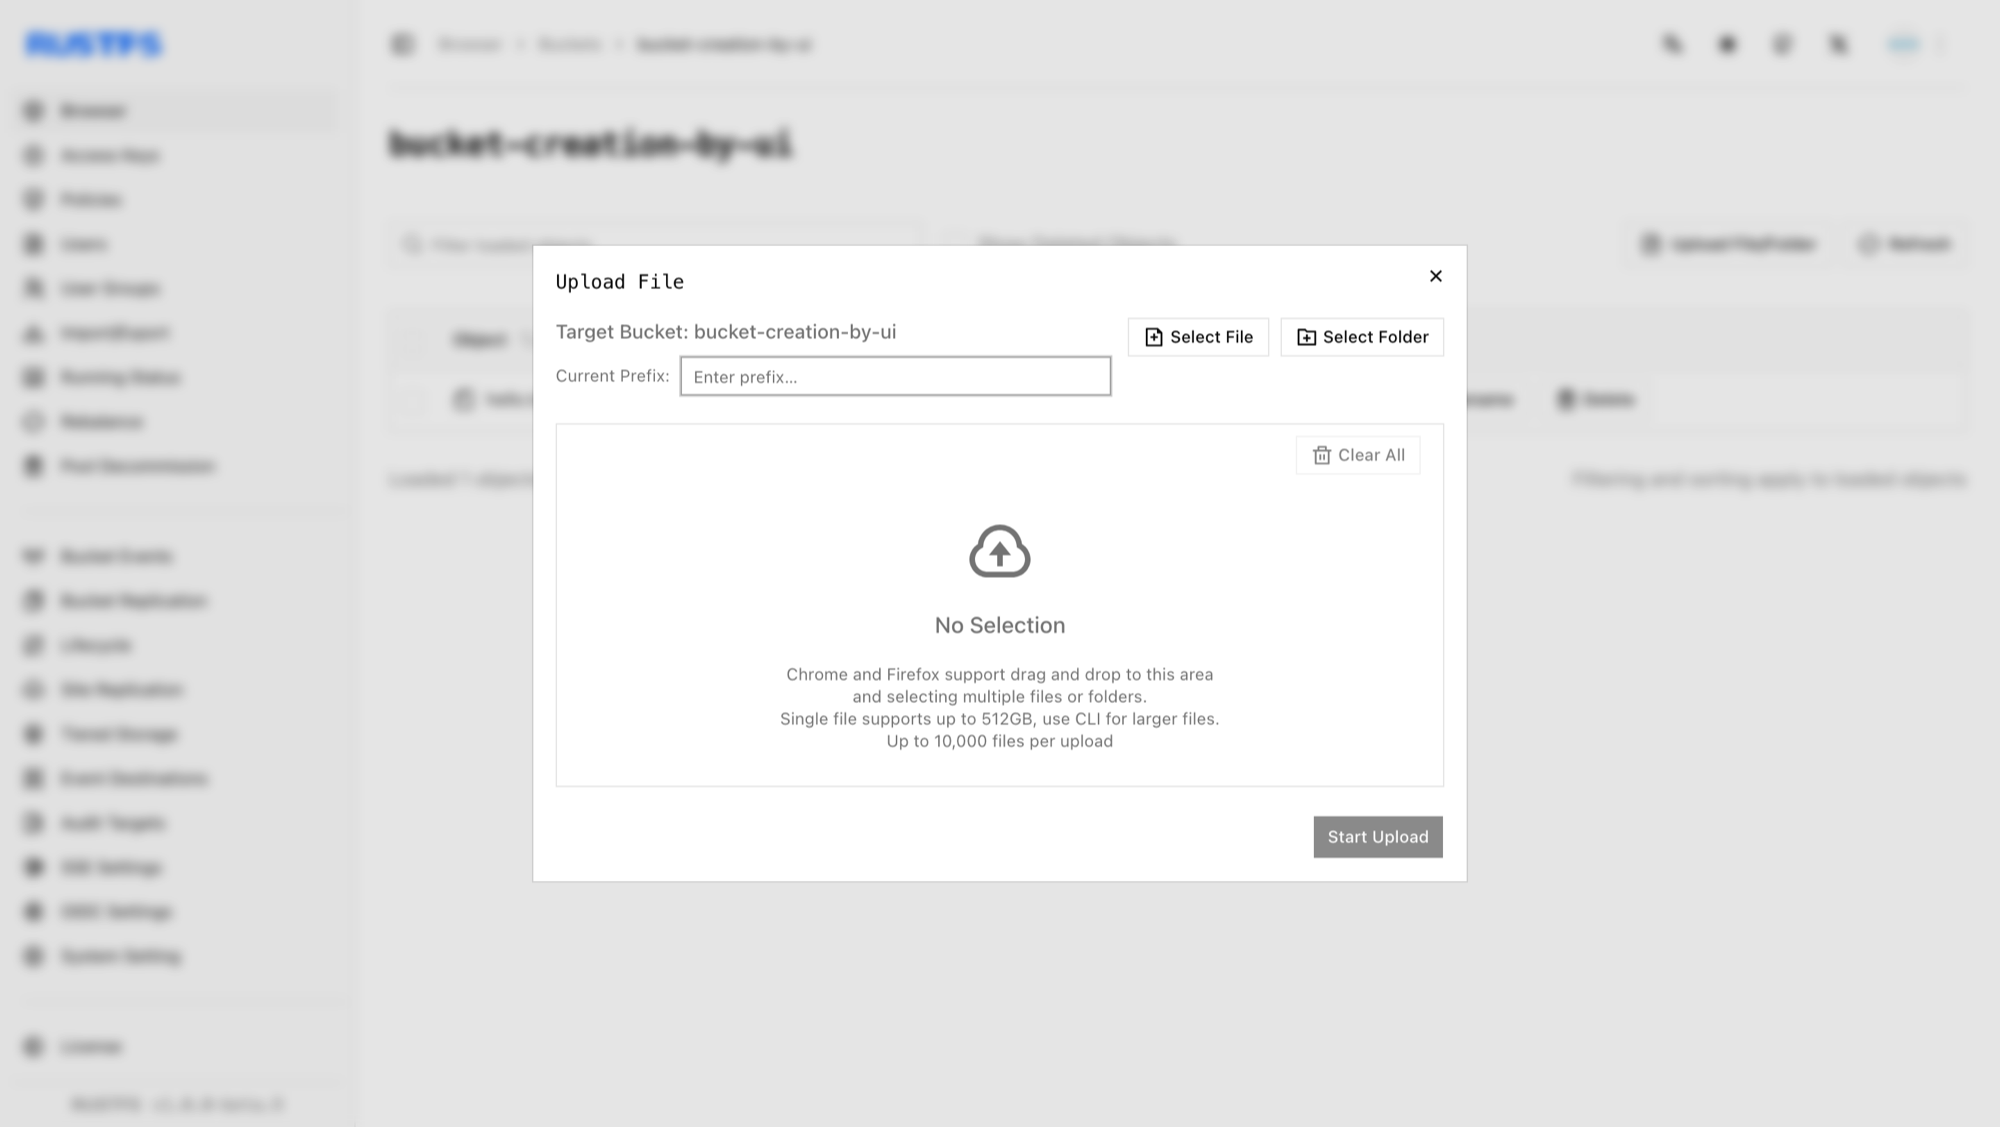
Click the uploaded object to view its details — size, ETag, content type, and a shareable link.
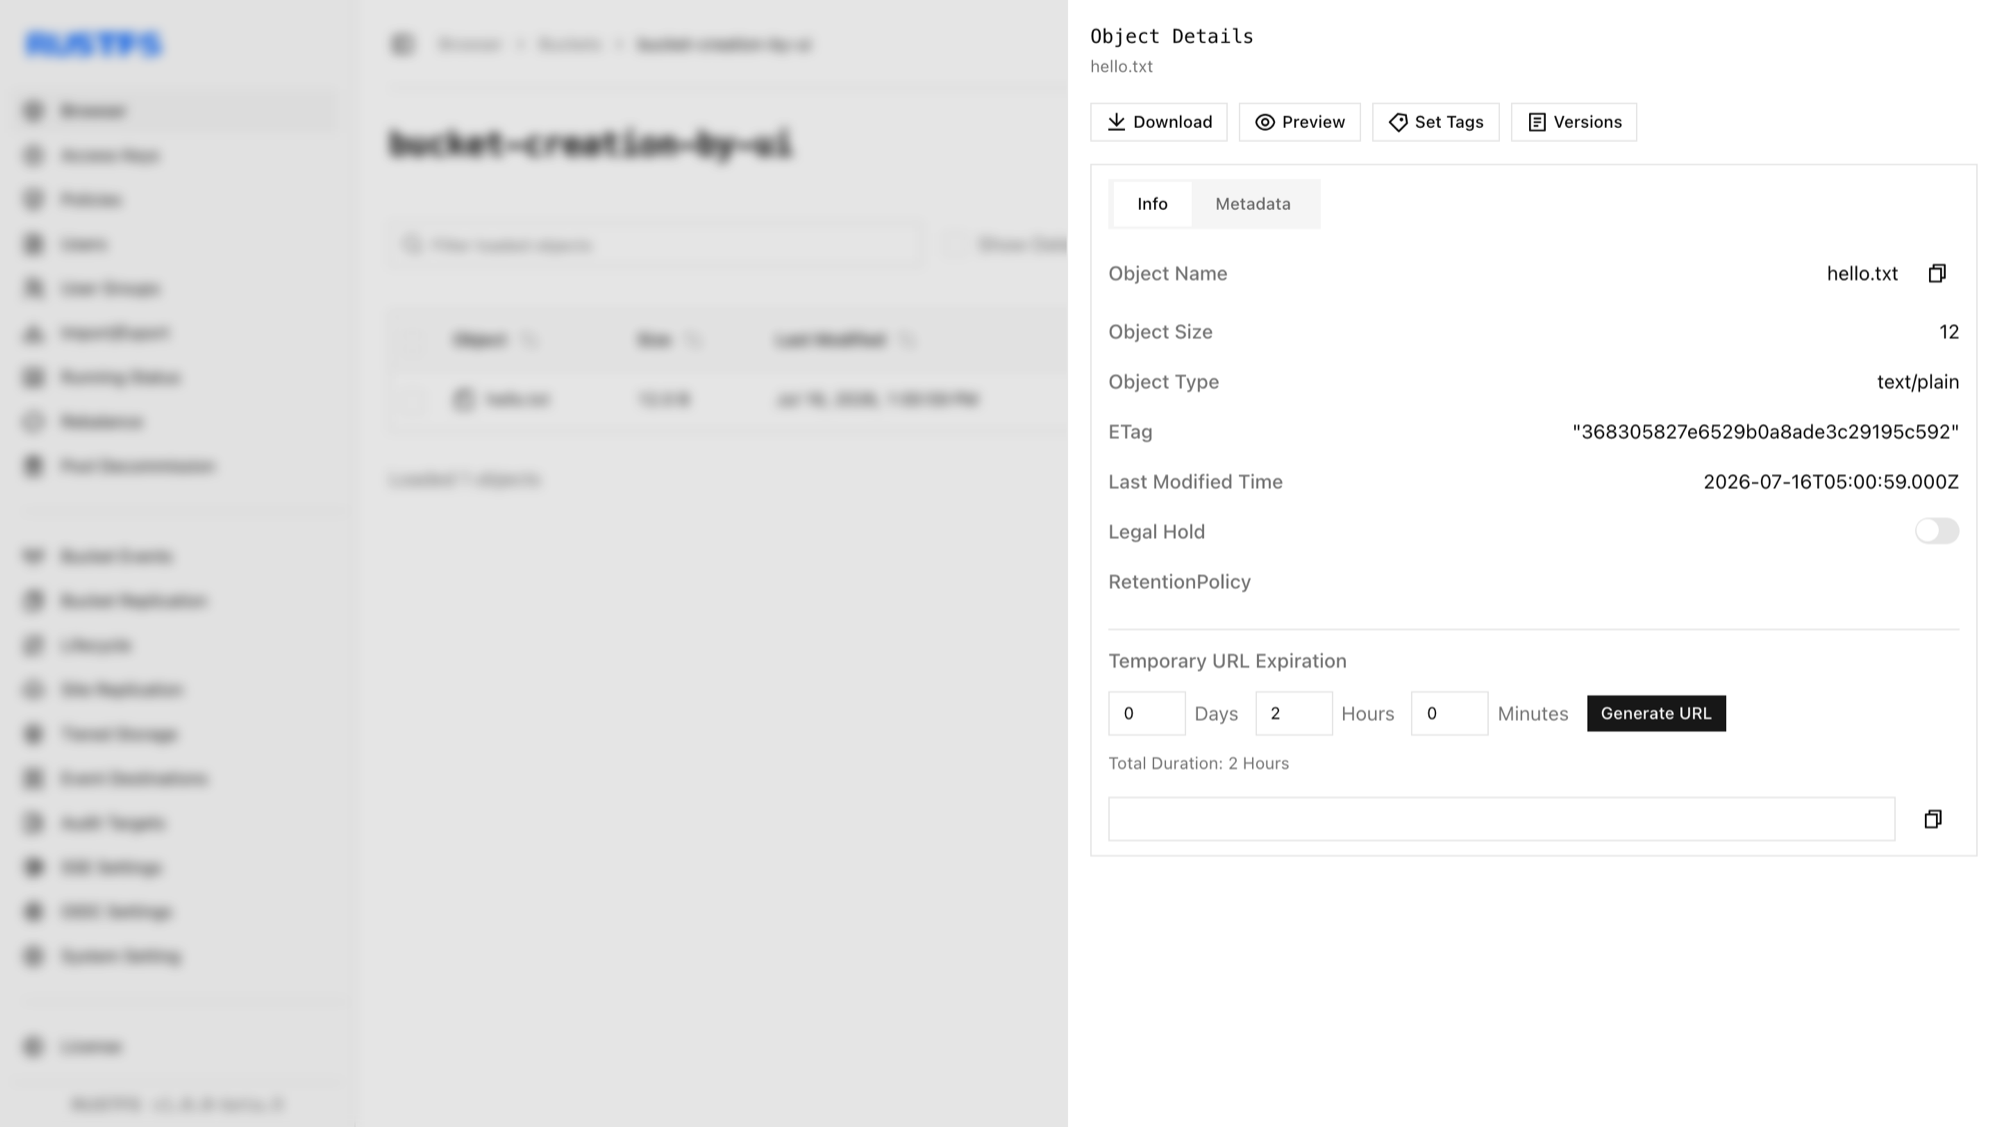
More options are covered in Object Creation.
Create Access Keys for Applications
The console sign-in credentials are administrator credentials — applications should use their own keys instead. Go to Access Keys in the console to create a scoped access key / secret key pair for your S3 clients and SDKs. See Access Key Management for the full walkthrough.
Next Steps
- Point any S3-compatible client at
http://<server-ip>:9000(the S3 API port) with your new access keys. - Explore IAM management to add users and policies.
- Review the production checklists before going live.